|
|
|
|
|
|
|
|
|
 Posted: Fri Jul 01, 2011 12:58 pm Posted: Fri Jul 01, 2011 12:58 pm
 |
|
|
 |
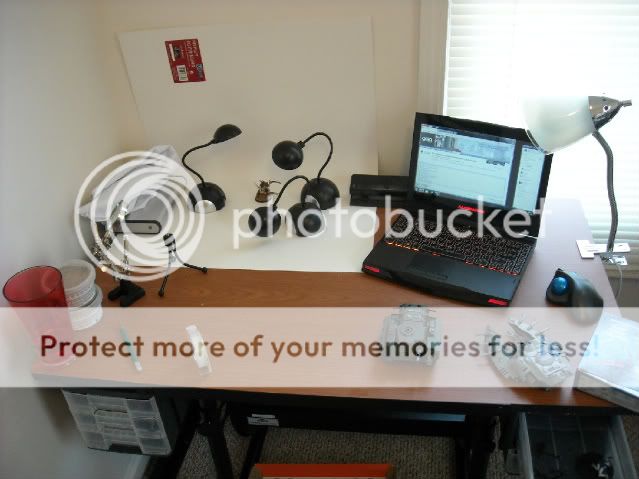
Hey guys! Been forever since I've been able to do any model projects, and I've been craving it more and more as time goes by. Since I moved to Virginia (a couple years ago now, bleh!), I haven't been able to set up my workshop yet, let alone a photo backdrop.
In advance of getting back, I've ordered 3 bright LED lights and a mini camera tripod to set on the desk. When I'm able, I'm going to post a step-by-step guide to making a photo backdrop that will make your models photograph with no blur, no shadow, and the best representation of color. Hopefully soon after that, I'll be able to start posting photos of new models I've been working on, but that's getting ahead of myself. One thing at a time.
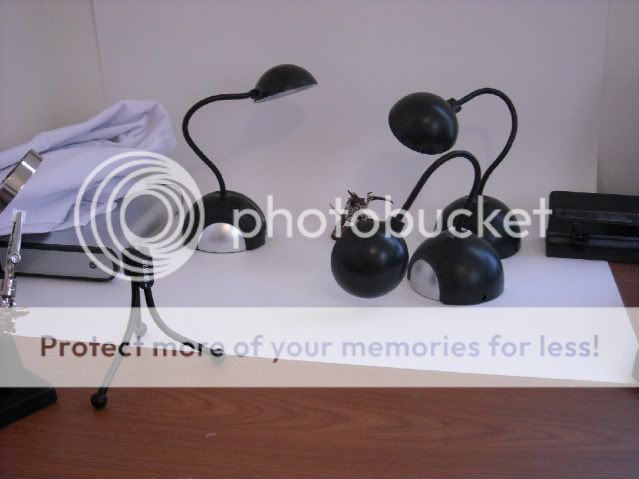
I have a shortage of outlets in my house, and USB lights were cheaper anyway, so I ordered 3 of these, and a USB strip to power them. You could almost certainly do the same job for less money with a few reading lights from a dollar store, but I wanted a more permanent setup. We'll see how it goes!
The lights serve to illuminate the model with white light from as many angles as possible, so as to reduce shadows and dark spots. It's also better for your camera, because they take better pictures and focus better in good light. You never want to have to use your flash, because it'll wash out the color of the model, make it too bright.
I also got one of these flexible mini-tripods to use with a time-delay photo for the least possible motion-blur. It was ridiculously cheap and had very positive reviews, the only possible downside is that my camera's anchor point is most of the way to one side, so it might tip over, but we'll see.
More updates to come (hopefully) soon!
|
|
|
|
|
|
 |
|
|
|
|
|
|
|
|
|
|
|
|
|
|
|
|
|
|
|
|
|
|
|
|
|
Posted: Wed Jul 13, 2011 1:07 pm
|
|
|
|
|
|
|
|
|
|
|
Posted: Fri Jul 15, 2011 1:06 pm
|
|
|
|
DarkElf27 Asmusei -Faceless Hunter- Maybe this would help for anyone who would like to do a DIY: cheap LEDsDigital Camera for under 50 USDand just need a cardboard box with 1/8 inch grid paper (for scale size if desired) I personally like to use the whole box thing with 90 pound printing paper on the walls and bottom of the box to reflect as much light as possible. Also, having a piece of paper over a cluster of the lights will help diffuse the light to give a "softer" light source, so even if there is any shadowing, they aren't as solid from the clusters. A bar of lights also helps, but it's really a trial-and-error kind of thing. On my old setup I had white hankerchiefs clipped on over the lights to soften it, it worked pretty well. This time around it's going to be trial and error, I don't know if I still have those anymore. |
 |
|
|
|
|
|
|
|
|
|
Asmusei -Faceless Hunter-
|
|
|
|
|
|
|
|
|
|
|
|
Posted: Sat Jul 16, 2011 7:02 am
|
|
|
|
Asmusei -Faceless Hunter- DarkElf27 Asmusei -Faceless Hunter- Maybe this would help for anyone who would like to do a DIY: cheap LEDsDigital Camera for under 50 USDand just need a cardboard box with 1/8 inch grid paper (for scale size if desired) I personally like to use the whole box thing with 90 pound printing paper on the walls and bottom of the box to reflect as much light as possible. Also, having a piece of paper over a cluster of the lights will help diffuse the light to give a "softer" light source, so even if there is any shadowing, they aren't as solid from the clusters. A bar of lights also helps, but it's really a trial-and-error kind of thing. On my old setup I had white hankerchiefs clipped on over the lights to soften it, it worked pretty well. This time around it's going to be trial and error, I don't know if I still have those anymore. It sounds like a great solution, maybe you could go to a craft store and simply find some white fabric? That way you can cut it to the proper size, probably even stitch it around a metal wire of sorts to make a frame to hold it for the lights. What did you do for a back-drop? I'm quite sure you know what you're doing, much more than I do. confused |
|
|
|
|
|
|
|
|
|
|
|
|
|
|
|
|
|
|
|
|
Posted: Sun Jul 17, 2011 1:47 am
|
|
|
|
|
|
|
|
|
|
|
|
|
|
|
|
|
|
|
|
|
|
Posted: Sun Jul 17, 2011 6:06 pm
|
|
|
|
DarkElf27 Asmusei -Faceless Hunter- DarkElf27 Asmusei -Faceless Hunter- Maybe this would help for anyone who would like to do a DIY: cheap LEDsDigital Camera for under 50 USDand just need a cardboard box with 1/8 inch grid paper (for scale size if desired) I personally like to use the whole box thing with 90 pound printing paper on the walls and bottom of the box to reflect as much light as possible. Also, having a piece of paper over a cluster of the lights will help diffuse the light to give a "softer" light source, so even if there is any shadowing, they aren't as solid from the clusters. A bar of lights also helps, but it's really a trial-and-error kind of thing. On my old setup I had white hankerchiefs clipped on over the lights to soften it, it worked pretty well. This time around it's going to be trial and error, I don't know if I still have those anymore. It sounds like a great solution, maybe you could go to a craft store and simply find some white fabric? That way you can cut it to the proper size, probably even stitch it around a metal wire of sorts to make a frame to hold it for the lights. What did you do for a back-drop? I'm quite sure you know what you're doing, much more than I do. confused Well, I used a big piece of white posterboard for a backdrop, curved so there aren't any visible folds behind the model. You could do the same thing with printer paper really, so long as you can avoid creasing it. That way, the backdrop below the model and behind the model sorta combine, and in photos, it looks like it's just suspended in a white space. |
|
|
|
|
|
|
|
|
|
|
Asmusei -Faceless Hunter-
|
|
|
|
|
|
|
|
|
|
|
|
Posted: Fri Jul 22, 2011 2:58 pm
|
|
|
|
|
|
|
|
|
|
|
|
|
|
|
|
|
|
|
|
|
|
|