In the UK WD 343 there was a painting guide that I tried out, it's simple and most important effective.
It only needs the most basic skills (aka you can hold a pencil and use paint to completely cover any area of a mini) and a steady hand (as long as you don't get paint ALL over the mini you should do fine).
This guide will include simple highlights and basic shading with the help of inks from the foundation paintset, Devlan Mud in this case (I think it should do fine on any other mini too).
Basicly, you just use the paint you want on the mini, just skip the details since you'll take those AFTER the wash, and make sure you cover all the areas, even small gaps between fingers etc, no drybrushing, just cover the mini and make sure the paint have a strong look, like we all know painting yellow is hard since the undercoat mostly can be seen through it, so you might need to put 2-3 layers on depending on what paint you use.
And this is what the stage 1 model should look like when you got the paint on.
Not really a beauty as you see, but yet it's tabletop, and many starters start painting like this.
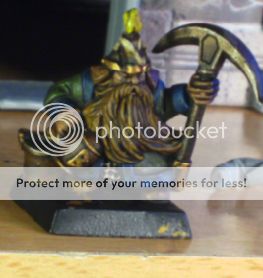
Next step, is adding a wash of Devlan mud (I used plenty of it since I wanted a somewhat dirty look on my dwarf), and then you can place it under a lamp and either watch it, or go do something else since the new foundation inks take some time to dry compared to normal inks.
This is what it would look like when it's inked.
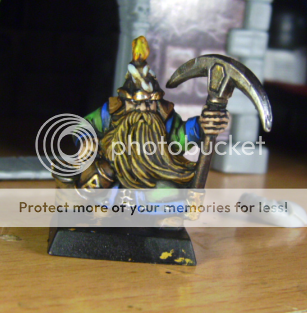
And as soon as it's dry, you just take the same colour you started with, and start highlighting, all you need is paint on the strong edges (cheeks, noses, fingers, pointy bits, folds etc). Areas with hair and fur just needs a light highlight on it, so be careful so that you won't get paint between the hair and such so that the depth of the model gets ruined. Details such as eyes etc can be added now when it's nearly finished.
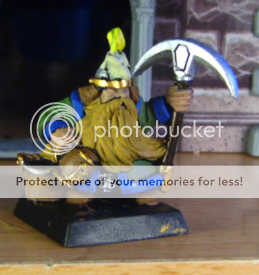
And here is the finished model, just needs some basing and he's ready to join the lads!
It's simple, but mind you that the drying time is 20-30 minutes I think (depends on how much you use), so my tips is to paint several minis at the same time.
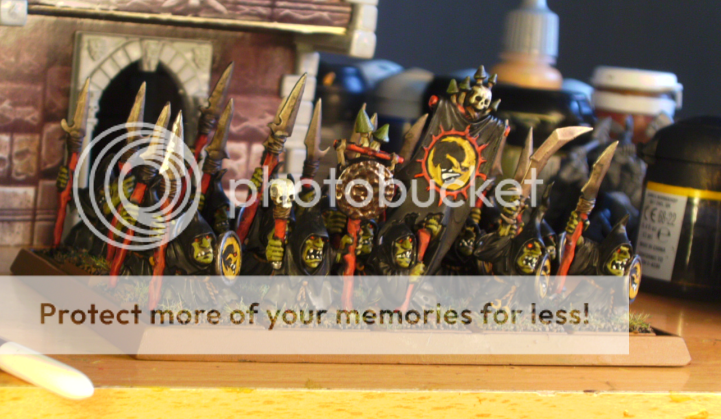
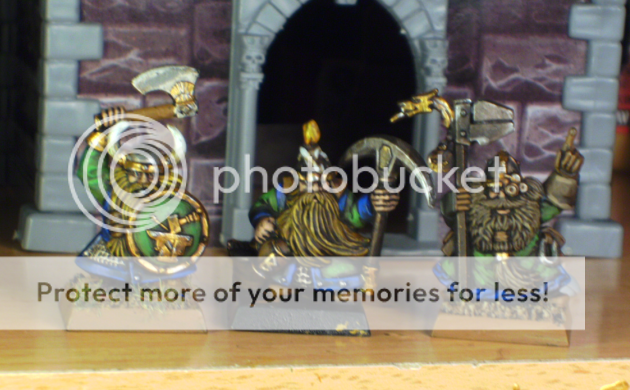
Just to show 2 other successful minis I took this groupshot.
Hope the guide will help you out to get that nice army you've always wanted~


![[.Psycho.Doughboy.]'s avatar](https://a1cdn.gaiaonline.com/dress-up/avatar/ava/ef/9b/6060910b439bef_flip.png?t=1348185404_6.00_11)